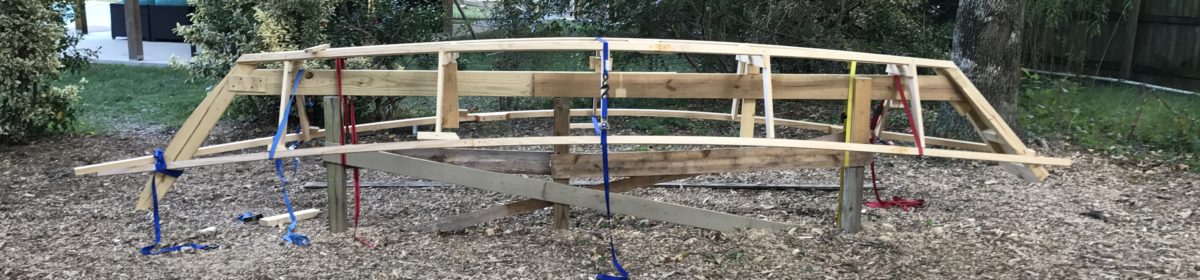
With the chine and sheer in place on the frames, the internal skeleton or framework of the dory was completed. We trimmed the long ends of pieces, sanded edges flush, and looked for anything that may be out of line. Since we took so much time to ensure our measurements were correct during the lofting process and we made sure all of the frames were properly spaced, all of the curves and lines of the boat turned out very fair and pleasing to the eye. The only big step remaining was beveling the ends of each frame to follow the curve of the boat so that the frame sides would meet the plywood siding and bottom in a flush manner and provide a solid surface to glue and screw the plywood to.
We didn’t take pictures of the beveling process, but we will be the first to tell anyone that a power planer made short work of the task. We used a long batten, made from joining a few pieces of thin paneling material together, to place along the frames and get the general feel for how each frame edge needed to be beveled. This task was certainly artistic in nature as the bevels are all different for each frame. The beveling was also different along the edge of each individual frame, and careful planning, measuring, and fitting up proved to be the key to make sure the bevels had the appropriate angle and transitions to them. Our only additional advice with this process is that if you are using a power planer – be cautious and deliberate – this power tool can take away a bunch of wood real fast and you might have a hard time recovering if you cut away too much!
One additional area that needed some attention was the stem. We noticed that the way the chine and sheer interacted with the stem that there would not be much surface area to attach the plywood siding. Since the siding in this area comes to a point, it is under the most bending stress and needs a significant surface to attach to. We added some wood cheeks to the stem so that we could plane them down and create more surface area to attach the plywood sides.

Once the cheeks were attached, we cut the bulk of them away with a jigsaw.

Now that the cheeks and the stem were in line with each other, the power planer made short work of planing them down to the smooth curves of the boat. We used the batten again to help us make smart cuts and plane down to about where we wanted the areas of the stem. From there, a belt sander brought everything into a fair curve.

With the stem area completed, we moved on to attaching the sides of the boat. We used ⅜” exterior plywood for the sides and the bottom. The plywood came in 4’ by 8’ sheets, and with such a small dory, we were able to simply epoxy coat the frames, sheer, and chine where they met the plywood and then screw a panel into place. We used butt blocks to join the plywood pieces, overlapping each edge by about 6” on each side. Screws held everything together until the epoxy cured. We removed most of the screws after everything had set.


Once the side pieces had cured, we used a jigsaw to cut away the excess plywood and then used the planer and the belt sander to fair everything in place. After we completed installing the sides, we moved on to getting the bottom ready for the plywood.
Using the same technique that we did for beveling and smoothing the sides of each frame to meet the plywood, we did the same thing with the bottom of each frame. The belt sander and power planer made short work of this task. Be careful not to take away too much wood! It’s hard to repair once too much is cut away!

With the bottom frames beveled and fair, it was time to install the plywood bottom. We applied epoxy to each frame bottom and then laid the plywood panels on top of the bottom of the frames. Screws were used along each frame bottom and the chine to hold everything in place. Like we did with the sides, we removed most of the screws once everything had cured.


A jigsaw was used again to cut away the excess plywood on the bottom. The planer and a belt sander brought everything flush and fair.

We then took our time with the belt sander and an orbital sander to go over the entire boat to smooth everything out. Edges were rounded, high spots were identified, and sharp points were smoothed. We also used thickened epoxy to fill all the screw holes, sanding again after each application to ensure as many of the bumps and imperfections were smoothed over.

All of the sanding and smoothing is to ensure the bottom and the sides are ready to be fiberglassed. We didn’t want anything poking through the fiberglass and we knew fiberglass doesn’t like to bend at sharp angles. So we took the time to make sure everything was properly rounded and smooth.


Once the boat was smoothed and rounded, it was time for fiberglass! Click here to see the outside of the boat get fiberglassed!