After a few month hiatus from working on the dory while the family moved to upstate New York, we settled back into boat building by focusing on completing the rub and cap rails. We finished building the structure of the boat, joining the frames together with the chine and sheer after ensuring everything was properly spaced. We then prepared the exterior of the boat and installed the fiberglass cloth under multiple layers of epoxy. At this point, the boat exterior was complete (other than painting the hull) and we flipped it over in order to get the dory a new home for the winter.
Once in New York, we started working on the topsides of the boat. The topsides consist of the rub rail, the cap rail, and the turtledecks.
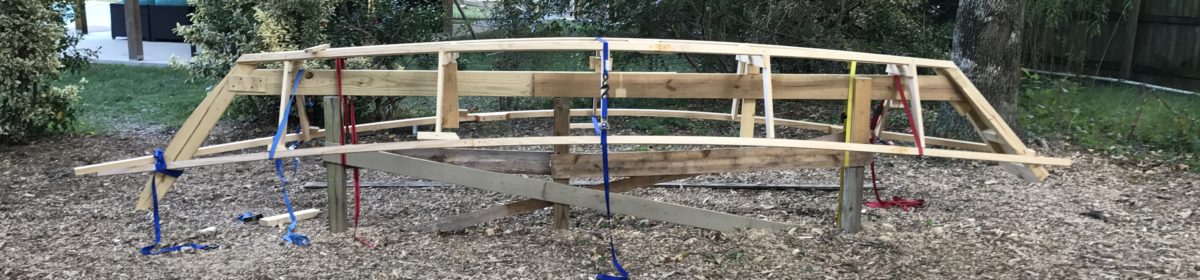
The rub rail is the portion of the boat that is on the uppermost edge of the exterior of the boat, and like the name implies, it is the piece that absorbs the brunt of the bumping and rubbing the boat will have with piling, piers, and other structure once out on the water. We wanted to make sure we added this piece so it can take all the abuse and protect the rest of the hull from contact with structures that could scratch or damage the hull.
We used 1”x3” lumber to make the rub rail. The process was fairly straightforward and we simply mixed some thickened epoxy and applied it to both the rub rail and the hull. Then a series of clamps held the rub rail in place. We added additional strength by screwing the rub rail to the sheer clamp.


Once the epoxy had set, we then removed the clamps and started on the addition of the next piece. We did not splice anything together for this process. We butted each piece next to the previous, epoxied, and clamped it in place.

The process was repeated down the port and starboard sides of the boat from bow to stern. Thickened epoxy was used to fill voids and make fillets at the joints to ensure a solid bond and to avoid creating areas where water could penetrate.

We will eventually fiberglass over the top of the rub and cap rails, creating a thick, abrasion resistant surface that will enhance the durability of the boat.

With the rub rails in place, it was time to finish the cap rails.
The cap rails were the hardest to install and assemble thus far. We believe they were so difficult because of the compound twists and bends that you must impose onto a straight 1”x3”.
We started by using heavy duty clamps to coerce a 1”x3” into position along the inside of the frames. We know we are going to make a forward and aft locker at the bow and stern, so the cap rails did not need to go from stem to stern. The first and last frames would be capped with a turtledeck and a bulkhead to make these lockers, so we left that area free and clear of the cap rails.


As we bent the inside cap rail into place, we had to bevel the inner edge of each frame to accommodate the piece of wood, just like we had to bevel the frames for the chine, sheer, siding, and bottom. We learned during this part of the build that you can never have too many clamps when building a boat. The clamps made short work of the straight piece of wood, although we gained a healthy respect for lumber under the stress of a bending load – watch out of one of the clamps gives way!
With the frames beveled and everything set, the inside cap rail was epoxied into place. We ensured it was high enough so that the plywood cap would have an area to bond to once installed.
Once the inside cap rail was in place, the plywood cap was installed. A small piece of lumber was epoxied to the outside of the inner cap rail so that the inboard portion of the plywood had something to adhere to. You can see this small “shelf” piece in a picture below. We started on the starboard side and installed pieces of plywood over the rub rail, the sheer clamp, and across to the inner cap rail. Small nails held everything together while epoxy cured.


We continued around the dory, once section at a time, until the cap rail was installed.


Once the epoxy cured, we planed down and sanded the inner cap rail to be flush with the plywood cap. This made for a solid structure and really stiffened up the dory.
We will install additional structural support members, especially in the areas where we will install oar locks.
With the cap rail installed, it was time to build the forward and aft turtledecks. Click here to see the turtledeck installation!