After lofting is complete, it’s really time to get your hands dirty and start building. Before you can construct any frames, however, you need to make sure you have the right type and size of wood (or whatever other materials) to use during construction. Your designer will most likely specific what type and dimension of the materials in your plans, so make sure you consult them before moving forward with your build.
There are hundreds of opinions on what types of wood to use to build a boat. Each species of wood has its pros and cons, and there is a wealth of information online when you look for it. We weren’t too worried about the type of wood we were going to use since we intend to put several layers of protective epoxy all over the boat, fiberglass the majority of it, and paint it too. Additionally, since it is such a small boat, it’ll spend the majority of its life out of the water on a trailer. As such, we were not particularly picky about the wood type – we wanted wood that straight and uniform, with a minimum of knots or voids in it.
We settled on select yellow pine, straight grained, and sanded. Our frames are built from 1×4 boards, cut and connected with exterior screws and epoxy.

To start, we transcribed and marked measurements from our lofting onto the boards. Using a miter saw, we made the appropriate cuts, ensuring the angles were measured two times at least before cutting the wood.

After cutting each piece of wood, we laid them onto the lofting patterns to make sure everything fit. After a few pieces, we became proficient at marking, cutting, and verifying each piece as it was made, ultimately coming up with the correct dimensions to put all the frames together.
Once all of the pieces were cut, we started building the frame. The Nova Scotian design is a very simple boat to build. Each frame is three pieces that are joined together with simple fasteners and glue. The two side pieces are overlapped on top of the bottom piece, and the bottom piece is marked to identify the overlap. The pieces are then removed and epoxy is applied to the overlap areas on all the pieces. Then, using clamps, the pieces are reassembled and fastened with exterior screws. They are then left to dry to let the epoxy cure.
Once the frame has cured, the clamps can be removed. We chose to wait to remove the clamps until after the epoxy cured just to give the frames more rigidity during the cure period. We removed some of the clamps, however, after fasteners were installed and the frames held together just fine. You can do it either way!

Building the frames was a simple process. One of the reasons we chose this design was for its simplicity. We figured that once we master some of these basic woodworking and boat building techniques, we’ll be able to build more complicated boats!

We did enjoy setting up the frames to imagine what the boat would look like as it ultimately took shape. Our lofting pattern seemed pretty miniscule on paper, but building the frames and laying them out really showed us how big the boat was going to be! It was fun to imagine being out at sea while still standing in the garage!


Even though we completed the frames at this point, we needed to build two other structural pieces of the boat: the stem and the transom. The stem was cut from a 2×6 to a rough shape and the transom was built of plywood and 2×4 pieces to the lofting pattern and per the blueprints.
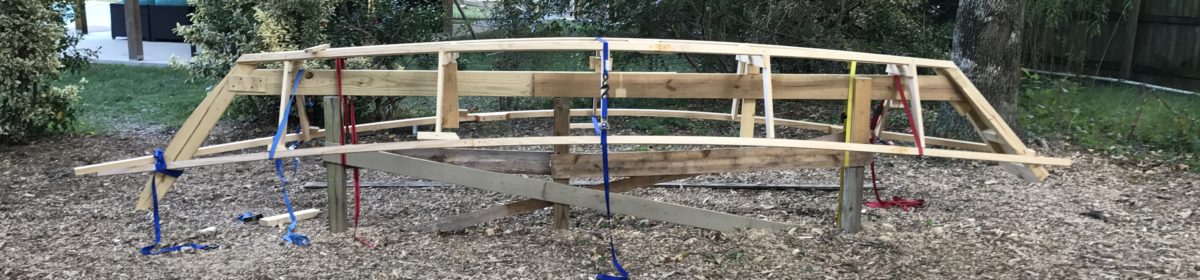
The frames, stem, and transom would form the base structural components of the boat that we would eventually have to set in place and tie together with other components, like the chine, sheer log, and keelson.
All of these pieces would need intermediate support, however, before the bottom and sides could be installed, and that is what we tackled next. The intermediate support is called the strongback, and it was time to take the build into the backyard!
Click here to follow along as we set the strongback and have our backyard dory take shape!
Thanks for the info this is the size for me,build will start soon