In order to waterproof all the wood used to build our dory, we intended to encapsulate the entire outside of the boat with epoxy. To provide additional strength and abrasion resistance, we decided to use both fiberglass and epoxy to protect the bottom and sides of our boat. This method has been utilized over the years to protect wooden boats from the harsh marine environment and to prevent wood rot that will form when wood is immersed or repeatedly wetted.
Fiberglass comes in various lengths, widths, and weights, as well as with a wide range of thread or strand orientations. Each characteristic of fiberglass provides it a unique property, whether it is for strength, moldability, weight, or some other property that is useful in creating durable and strong structural components or sheathing. We chose 6 ounce cloth to sheath our boat. We chose this weight for its ease of application and its ability to help strengthen and make our boat more durable.
Unfortunately, by the time we got around to fiberglassing our boat, it was fall outside and the leaves were starting to turn and fall to the ground. Since we decided to build our boat in our backyard, it was always open and exposed to the elements. We did keep a taut tarp over the boat when we weren’t actively working on it, but it wasn’t practical to build an enclosure around the boat just to fiberglass it. We did recognize the need, however, to keep it covered so that leaves and other debris wouldn’t fall onto it and get stuck in the sticky epoxy that we were applying. A portable pop up tent worked perfectly for us. We’ve found these small tents are so useful for things other than simply providing shade at a tailgate!
The fiberglass cloth came in a 50” wide roll. We ordered 36 yards of the cloth, which was enough to cover the bottom and sides with not too much left over.
We started by applying the fiberglass to the bottom of the boat. The process wasn’t too difficult, and a few simple steps made short work of the application. The list below outlines the basic process:
- Fully vacuum and clean the surface to be fiberglassed. It needs to be free of dust, dirt, grease, sawdust, and other particulates that will get trapped between the fiberglass and the surface it’s being applied to.
- Roll out or cover the area to be fiberglassed with the dry cloth. Using sharp scissors, cut the fiberglass to shape to cover the area being fiberglassed. Use painter’s tape to hold the fiberglass in place as you cut and measure it.
- Once cut, roll the fiberglass back up or gently fold it. Avoid making any creases in the fiberglass as a crease will weaken or break the threads – making the fiberglass weaker overall once applied.
- Mix a batch of unthickened epoxy. Once mixed, apply a layer of epoxy to the surface to be covered with fiberglass.
- With the surface still wet and saturated, lay the fiberglass in position over the wet epoxy. Avoid moving the fiberglass too much during this part, but ensure it is laid down smoothly. Wrinkles, folds, or other imperfections should be pulled or smoothed out.
- Mix up more epoxy, and apply it to the top of the fiberglass. This is called wetting-out the epoxy and is the process that starts to fill the individual threads of the fiberglass with the epoxy resin. Let this layer of epoxy start to cure.
- Apply additional layers of epoxy on top of the fiberglass. The goal is to completely fill the weave of the cloth with epoxy. Ideally, epoxy is re-applied before the previous layer of epoxy fully cures. This allows each layer to bond chemically. If this is not possible, subsequent layers should only be applied after the first cured layer is “roughed up” with sandpaper. This allows a better mechanical bond between the layers.
- Continue with layers of epoxy until the weave is filled and the additional layers result in an additional thickness of epoxy above the fiberglass. At this stage, the fiberglass is completely encapsulated and your surface will be waterproof, protected, and sealed from the elements.
We did this over the course of a weekend on our boat. The bottom was fiberglassed first. Then we applied fiberglass to the sides and overlapped the bottom fiberglass. We continued to apply layers of epoxy until the boat with completely encapsulated. This process took several days but resulted in a measurable increase in the boat’s strength and smoothness.
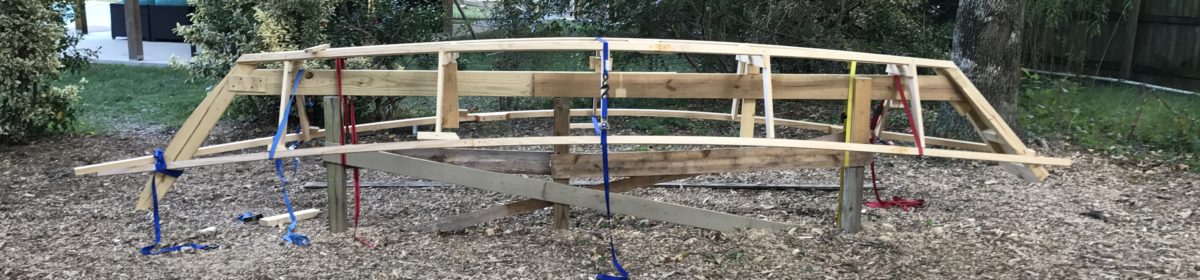
We did a terrible job taking pictures as we progressed through these stages of fiberglassing, but we did take some. Below you can see a few pictures of our setup and our trial fit of the bottom fiberglass before the epoxy was applied.


We took our time working through the steps outlined above and came out with a pretty solid exterior surface of the boat that will be ready for primer and paint when we get to that step.
With the exterior complete, it was time to flip the boat over and work on the inside! Click here to see the boat right-side up!