At this point we had pretty much had all the pieces we needed ready to space the frames on the strongback. When we built the frames, we took the time to also splice together the long pieces of 1x2s into 20 foot pieces that would become the sheer and chine pieces. We didn’t take any pictures of their construction, but each piece was butt joined together and a 10 inch piece of overlap was screwed and epoxied over the joint. A scarf joint would have been better, but we haven’t mastered that technique yet, so we went with this easier method. The joint turned out strong and flexible enough during the rest of the build.
The frame spacing is a key step in the build because it defines the shape of the boat. Applying measurements accurately from the plans is vitally important at this point so the boat pieces not only come together and fit properly, but also that they result in the proper dimensions of the finished vessel. Any errors made when setting the frames and their spacing will make for tough fixes later!
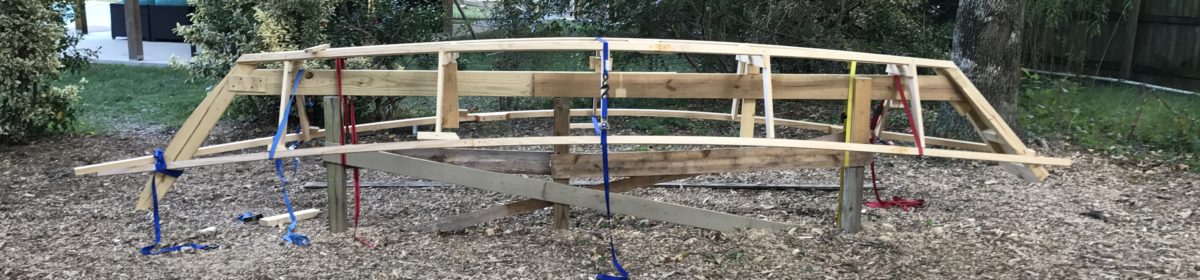
We laid the frames atop the strongback in their rough positions to see how they started to fit together as a whole. In order to help hold them in place, we used a 14 foot 2×4 as a keelson that was “convinced” into place with ratchet straps. The keelson is the structural member that links together the frames at the bottom of the boat and will translate the rocker, or bottom curve, to the plywood bottom once installed. Measurements were checked and checked again, as each movement of a single frame resulted in necessary changes to the others. While a tape measure provided concrete verification that things were shaping up properly, we found that just eyeballing the frames from every direction was all that was really needed to ensure straightness, smoothness, and fairness overall. It was usually pretty obvious that something wasn’t right just be standing back a few yards from the boat and looking at it. The ability to look at the boat from a distance was a welcome advantage to build in the backyard!

Once the frames were set in their final positions, a series of reference marks were made to fall back on should we accidentally jostle something. As each frame was set, we used scrap pieces of wood to firmly hold everything in place. This step is also crucial, because as we found out later, you have to put tremendous force on the structure in order to bend straight pieces of wood into the beautiful curves of the boat. So make sure your frames are set firmly!

As mentioned previously, we set the boat’s stem and transom in place first, making sure they were square, plumb, and in-line with both each other and the strongback. These key pieces of the boat’s structure also served as reference points for the frames as they were set in place.

Finally, with all the frames set in place, we measured, measured, and measured again to make sure everything was in its proper place. Then, we conducted another series of fairness checks with just our eyeballs, providing us the confidence that everything was where it should be. With this confidence, we knew it was time to tie everything together by installing the sheer and the chine!

Click here to watch our dory come alive as the sheer and chine are installed!