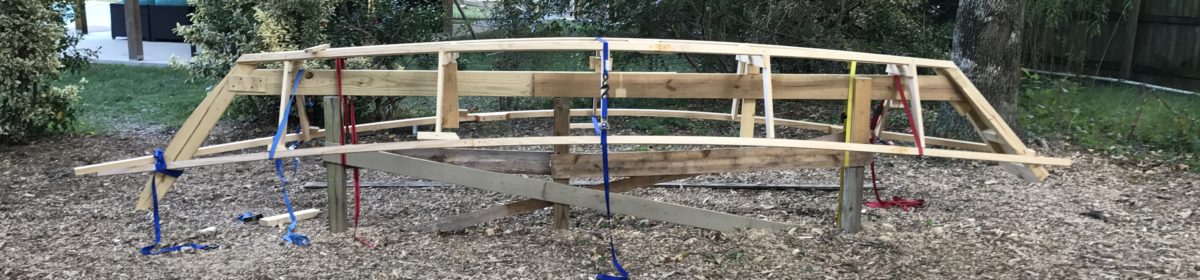
I’m getting old and can only row so far for so long. My two daughters, Samantha and Allie, haven’t ever rowed anywhere before. Because of this, we decided to cut a giant hole in the bottom of our beautiful boat so we can install a small outboard. This step of the build was certainly the most nerve-racking. We put so much effort into ensuring the boat was built tight and leak-free; what sane person would cut a giant hole in a perfectly good boat?!
Alas, we were determined to have outboard power for our dory. So we schemed a way to add a motor well. Before doing so, however, I scoured the internet for the best way to install a motor well, focusing on sizes, locations, depths, etc. It was obvious from my research there are two motor well camps: those that find them useful and those that don’t. During my searches, I came across side-mount outboards, which seemed like a good idea, but I was concerned because the waters where I’m going to use the boat will get relatively rough and I didn’t want to have a 40 pound outboard hanging over the side of the boat. I liked the idea of having the boat inboard the hull, on centerline, and easily reachable.
As such, I bought an outboard. I figure this 3.5 horsepower Tohatsu will be more than enough power, and it was just a few bucks more than the 2.5 horsepower and the same engine that just rev’s higher, so I splurged. At 40 pounds, I can easily move it around, so it seemed like a fitting choice. I wanted to have an outboard with a larger external fuel tank, but seeing as I won’t have to run it at full throttle, I imagine the small internal tank will last me long enough between refueling.

The next decision was whether or not to build a motor well that allowed the outboard to kick up into the well. I toyed with the idea, but in the end, my dory just seemed too small to take up so much space with a kick-up outboard well, so I didn’t build it that way. Plus I figured my dory won’t go faster than about 4 or 5 knots, so even if I run into something submerged or hit a shallow bottom, I’m not going to break anything (other than maybe a plastic propeller that I can easily replace). So I kept the motor well simple: a squarish hole in the bottom of a perfectly good boat with raised sides that kept the water out and the outboard supported.
Having the outboard on hand really helped this process, and I pulled measurements directly from the motor as I progressed. The design plans I had did not have specific well measurements, so I was truly building from scratch at this point. Not a huge deal and it was easy to piece things together as I went along. This outboard spins 360 degrees, so I made sure that I took measurements with the outboard in a multitude of positions so that I had enough clearance to spin it in a full circle. That made for a little larger of a well than if I didn’t use a 360 degree spinning outboard (i.e. used one with reverse gear), but not too much larger.
I decided to put the outboard just behind the fourth frame of the boat. Aesthetically, it seemed like the best spot, so I went for it. Measuring carefully, I transcribed the dimensions I needed from the actual outboard onto pieces of plywood that would serve as the sides of the motor well. I decided to make the back of the motor well at an angle in order to minimize the amount of water that either splashes or plows its way up the backside of the well.

Once the two plywood side pieces were cut, I sanded them as one unit so they were exactly the same. The last step for the sides was to make sure the bottom curvature of the boat, or rocker, was accurately transcribed onto the bottom edge of these side pieces. With the rocker roughly drawn to shape, I cut and sanded the bottom portion of these side pieces so that they conformed to the rocker on the bottom and sat level and plumb at the top.

With the side pieces in position based on my end-to-end measurement of the outboard’s lower unit as it rotated through 360 degrees, I spaced the side pieces appropriately and drew the lines onto the bottom of the boat that marked the hull cut that would soon be the opening for the motor well.
I can tell you that I sat and stared at these lines for some time before I even plugged in my saw. Then I measured them again just to be sure. Then I broke out the saw. And then I measured them again!

And the moment of truth was upon me. Time to cut a giant hole in the bottom of my perfectly good dory. I utilize a jigsaw and an oscillating saw to carefully cut along my markings. Drumroll please…

With the drama of the hole being cut behind me, I pressed on with the installation of the motor well. Using spacer pieces of scrap lumber and several clamps, I positioned the motor well sides into place and made measurements for the front and the back pieces of the well. Once measured, I cut them out, sanding them to fit, and readied them for installation.


With the front and back pieces ready to be installed, I applied them, one at a time, bedding each in a solid mix of thickened epoxy. Once the epoxy set, I removed the temporary bracing and the motor well was complete!


I ended up adding a 2×4 to the front of the upper edge of the motor well so the outboard had a little more substance to bite into when I tightened down its mounting screws. You can see the addition in the pictures below when I test fit the outboard. It ended up fitting perfectly and I can only imagine the smile on my face finally having my mechanical oar in place! Yes, I did sit in the boat with the motor installed and made motorboat noises!


With a finished motor well, it was time to finish the fiberglass work and then paint the inside of the boat! Click each area to see how Elizabeth Lynn ends up!
Hi Kevin,
I have a client that wants a motor well in his Nova Scotian 4.9 Grand Banks Dory I came across you building blog and you have done it successfully, I will be fitting a Suzuki 2,5 Hp Is there any possibility for you to send me your dimensions and angles of your well. I enjoyed looking at your build you have some good techniques.
Kind regards Paul
Doesn’t appear to have room to tilt up the prop!
Tom – you are correct! No room to tilt up the prop; I didn’t want to take up any more space than I had to inside the boat. My solution was to get an outboard that only weighs 40 lbs. If I need to move the motor, I simply unscrew the transom clamps and pull the motor out of the well and into the boat! Pretty easy and has worked well.
Paul – I’m not sure if you will ever check this again since it has been almost 2 years since your comment, but if so, please reach out again and let me know the best way to send you the information you requested!
Want to a top up motor well in my 18 ft camp cruiser Location will be in bow area cabin in stern All manual Yamaha 4 Liked your idea of slanting the rear of the well Have you bad any problem with water coming over the well into the boat Thanks
Linn – at an exact speed around 3.5 knots, the turbulence in the well reaches some type of resonance and starts splashing into the boat. So as long as I go above or below that speed, it’s fine.